Friday, 17 May 2013

Custom Paging With GridView in ASP.NET 4.5

Now, in this article I will show another new feature of ASP.NET 4.5, the GridView Server control.
When there are bulk records to show in the GridView, developers often use paging to distribute the complete records with multiple pages to show the records in the GridView. This means that, when you change the page index, the GridView is bound everytime  from the database to show the next records.
There are mainly two ways to implement paging in the GridView.

The first is, we can use Gridview's default paging by setting it's property AllowPaging="true". The GridView will show the pager itself depending on the PageSize and total records. But this way is very tedious and degrades the performance of the application because everytime the PageIndex changes, the GridView will be bound with the complete datasource that is not required at all, as we need to show only data  to the corresponding PageIndex.

To improve the performance of the web application we usually create a custom paging control using many buttons or in any other way, since it binds the GridView with only relevant rows when the PageIndex changes. But it was also very tedious to handle all the combinations of clicks on page links and write a lot of code-behind code in the .cs file.
But, inASP.NET 4.5, the enhanced version of GridView resolved the preceding issues related to paging that I described earlier. Now, we can implement paging using the combination of Gridview's built-in paging with custom paging logic. In order to do this, the two new properties of the GridView is provided in ASP.NET 4.5.

Let's learn about both of these.

VirtualItemCount: This is the new attribute that must be used to implement this feature. This property gives the total records count that are available in your datasource. Based on this property GridView decided the number of pages to be shown in the pager control. Regarding this property two points are to be remembered:
1. You have more records count than the value of PageSize you will set.
2. The value of VirtualItemCount's must be higher than the PageSize value, otherwise the pager control will not be shown in the GridView.
3 If you set this property in code-behind, then it must be set before the DataBind method.
You can either set the value of this property equal to the total number of records in the database or you can also set some reasonable count number when the database is very large that satisfies the preceding two conditions.
AllowCustomPaging: This is another property you must use. This attribute tells the GridView that we are going to use CustomPaging with the control and helps us to implement built in paging with custom paging logic.
This attribute takes the Boolean value either true or false. You must set the value true to implement the built-in custom paging with GridView.
After implement the preceding properties, now you must handle one more event at the end. You will need to work with the PageIndexChanging event of GridView. In this event you need to write some lines of code.

1. First, get the new page index with NewPageIndex property of e and set it to the GridView PageIndex property.

2. And, then fetches the records on the basis of PageSize and the current PageIndex values from the database for that specific page number.
Now, if you have 50 records in the database and your PageSize is 10, then the GridView is bound with only 10 records to corresponding PageIndex. Now using the custom paging logic the GridView is loaded with only the data you needed.
After getting the conceptual knowledge, let's start coding to use GridView paging with custom paging logic in ASP.NET 4.5.
Open an ASP.NET application in the Visual Studio 2012.
Code of ASPX page.
The following mark to set GridView control.
custom-paging-in-gridview.jpg
As you can see in the code above, I used the "AllowPaging" and "AllowCustomPaging" properties of the GridView control.
  • Setting these two properties is not enough for us. This will not take effect on the GridView custom paging. You need to do some more code.
Now to do the code-behind coding.
Code Behind:
Set the "VirtualItemCount" property of the GridView with the total number of records in the database. And bind the datasource with PageSize 10 and PageIndex value

0 as this is first page to show.

protected void Page_Load(object sender, EventArgs e)
{
   if (!IsPostBack)
   {
      CustomPaging_GridView.VirtualItemCount = GetTotalCount();
      GetPageData(0, 10);
   }
}
After that we need to write code in the PageIndexChanging event of the GridView and bind the grid with the current page.
protected void GridView_PageIndexChanging(object sender, GridViewPageEventArgs e)
{
        CustomPaging_GridView.PageIndex = e.NewPageIndex;
        GetPageData(e.NewPageIndex, 10);
}
Here, I also create two Stored Procedures in SQL Server; one to fetch the total records count and another to fetch the data corresponding to the current page index.
To get the total records count:
create procedure gettotalcount
as
begin
select COUNT(*) from HumanResources.Employee
end        
Stored Procedure for implementing the custom paging logic:
create procedure GetRecords
(
@PageIndex int,
@PageSize int
)
as
begin
select
      [NationalIDNumber],
      [LoginID],    
      [JobTitle],
      [BirthDate],
      [MaritalStatus],
      [Gender]
from HumanResources.Employee
where businessentityid
between ((@PageIndex*10)+1) and ((@PageIndex+1)*@PageSize)
end

Here is the entire code of the application.
ASPX markup code.
<%@ Page Language="C#" AutoEventWireup="true" CodeFile="CustomPaging.aspx.cs" Inherits="CustomPaging" %>

<!DOCTYPE html>

<html xmlns="http://www.w3.org/1999/xhtml">
<head runat="server">
    <title></title>
</head>
<body>
    <form id="form1" runat="server">       
        <div>
             <asp:GridView ID="CustomPaging_GridView" AutoGenerateColumns="true" runat="server" PageSize="10"
                AllowPaging="true" AllowCustomPaging="true" OnPageIndexChanging="GridView_PageIndexChanging">            
                <PagerSettings Mode="NextPreviousFirstLast" FirstPageText="First" LastPageText="Last" NextPageText="Next" PreviousPageText="Previous" />
            
</asp:GridView>
        </div>    </form>
</
body>
</
html>
 
In the code above, I used PagerSetting mode to display the paging. You can see more modes in my previous article, click here PagerSetting Modes in ASP.NET GridView Control.
.Code for .cs file (C#).
using System;
using System.Collections.Generic;
using System.Linq;
using System.Web;
using System.Web.UI;
using System.Web.UI.WebControls;
using System.IO;
using System.Data;
using System.Data.SqlClient;

public partial class CustomPaging : System.Web.UI.Page
{
    SqlDataAdapter da;
    DataTable dt;  
    protected void Page_Load(object sender, EventArgs e)
    {
        if (!IsPostBack)
        {
            CustomPaging_GridView.VirtualItemCount = GetTotalCount();
            GetPageData(0, 10);
        }
    }
    private int GetTotalCount()
    {
        da = new SqlDataAdapter("gettotalcount", "server=.;database=AdventureWorks2008R2;user=--;pwd=--");
        dt = new DataTable();
        da.Fill(dt);
        return Convert.ToInt16(dt.Rows[0][0].ToString());
    }
    protected void GridView_PageIndexChanging(object sender, GridViewPageEventArgs e)
    {
        CustomPaging_GridView.PageIndex = e.NewPageIndex;
        GetPageData(e.NewPageIndex, 10);
    }
    public void GetPageData(int current, int pagesize)
    {
        da = new SqlDataAdapter("GetRecords", "server=.;database=AdventureWorks2008R2;user=--;pwd=--");
        SqlParameter p = new SqlParameter("@PageSize", pagesize);
        SqlParameter p1 = new SqlParameter("@PageIndex", current);
        da.SelectCommand.Parameters.Add(p);
        da.SelectCommand.Parameters.Add(p1);
        da.SelectCommand.CommandType = CommandType.StoredProcedure;
        dt = new DataTable();
        da.Fill(dt);
        CustomPaging_GridView.DataSource = dt;
        CustomPaging_GridView.DataBind();
    }
}
As you can see in the code above, I fetched the total records count and set it to the "VirtualItemCount" attribute of GridView at page load time and load the GridView with starting page index. After that I am fetching what I need for the current page and not binding the entire table to the GridView.
Now, build the application and run it.
You will see that the Gridvew is populated with only 10 records for the first page.
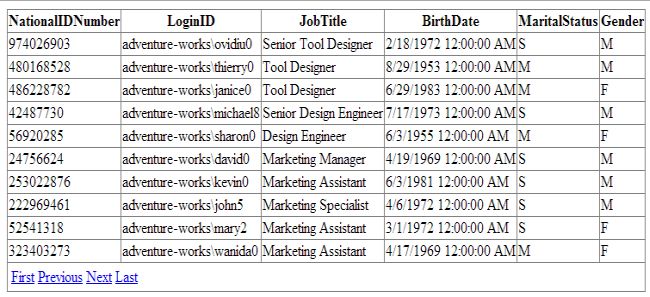
Gridview-paging-inasp.net4.5.jpg
Now, it will fetch the records easily when the page index is changed with only the required data that is needed without loading the complete table everytime.

Grid View with Advanced Pager using jQuery UI Slider

This is what we will get at the end of the article:
Update(02/05/2013) :: Code Download link: Download

ASP.NET Grid View is a very rich control and support lots of functionalities straight out of the box but sometimes we have to change things based on our own requirements. Today we will look how easily we can change grid view with support of jQuery UI slider to give its pager a nice look.
In this article we will use jQuery scripts and CSS straight from Microsoft CDN so let's start by adding following links:
<link href="http://ajax.aspnetcdn.com/ajax/jquery.ui/1.8.11/themes/start/jquery-ui.css" rel="stylesheet" type="text/css" />
<script type="text/javascript" src="http://ajax.aspnetcdn.com/ajax/jQuery/jquery-1.5.2.js"></script>
<script type="text/javascript" src="http://ajax.aspnetcdn.com/ajax/jquery.ui/1.8.11/jquery-ui.min.js"></script>

First link is for jQuery UI CSS class , Second for jQuery library and Third is for jQueryUI script.
Next we will add a script manager, update panel, and grid view on the page:

<asp:ScriptManager ID="ScriptManager1" runat="server" >
</asp:ScriptManager>

<asp:UpdatePanel ID="UpdatePanel1" runat="server">
<ContentTemplate>

<asp:GridView ID="GridView1" runat="server" AllowPaging="True"
AutoGenerateColumns="False" CellPadding="4" DataKeyNames="ProductID"
DataSourceID="SqlDataSource1"
EmptyDataText="There are no data records to display." ForeColor="#333333"
GridLines="None" Width="600px" PagerSettings-Visible="false">
<AlternatingRowStyle BackColor="White" />
<Columns>
<asp:BoundField DataField="ProductID" HeaderText="Product ID" ReadOnly="True"
SortExpression="ProductID" HeaderStyle-HorizontalAlign="Left" />
<asp:BoundField DataField="Name" HeaderText="Name" SortExpression="Name" HeaderStyle-HorizontalAlign="Left" />
<asp:BoundField DataField="ProductNumber" HeaderText="Product Number"
SortExpression="ProductNumber" HeaderStyle-HorizontalAlign="Left" />
<asp:BoundField DataField="StandardCost" HeaderText="StandardCost"
SortExpression="StandardCost" HeaderStyle-HorizontalAlign="Left" />
</Columns>
<EditRowStyle BackColor="#2461BF" />
<FooterStyle BackColor="#507CD1" Font-Bold="True" ForeColor="White" />
<HeaderStyle BackColor="#507CD1" Font-Bold="True" ForeColor="White" />
<PagerStyle BackColor="#2461BF" ForeColor="White" HorizontalAlign="Center" />
<RowStyle BackColor="#EFF3FB" />
<SelectedRowStyle BackColor="#D1DDF1" Font-Bold="True" ForeColor="#333333" />
<SortedAscendingCellStyle BackColor="#F5F7FB" />
<SortedAscendingHeaderStyle BackColor="#6D95E1" />
<SortedDescendingCellStyle BackColor="#E9EBEF" />
<SortedDescendingHeaderStyle BackColor="#4870BE" />
</asp:GridView>
<asp:SqlDataSource ID="SqlDataSource1" runat="server"
ConnectionString="<%$ ConnectionStrings:DemoConnectionString%>"
ProviderName="<%$ ConnectionStrings: DemoConnectionString.ProviderName %>"
SelectCommand="SELECT ProductID, Name, ProductNumber, StandardCost FROM SalesLT.Product">
</asp:SqlDataSource>

</ContentTemplate>
</asp:UpdatePanel>

We have added SqlDataSource after grid view to fetch data from sample database.
If you notice we have set allow paging property to true and pager-settings visible property of grid view to false so we can add our own pager on the page instead of using gridview's pager.
Now we will add two div elements first one is going to be for jQuery Slider and second is for displaying current page.
<div id="slider" style="width:600px;"></div>
<div id="sliderValue" style="background-color:#507CD1;font-weight:bold;color:White; width:600px;padding:2px;"><%=GridView1.PageIndex +1 %></div>

It's time to add out JavaScript to make our pager work:
<script type="text/javascript">
$(function () {
//Get current page index and add 1(one) to it because by default index start from 0
var currentPageNumber = parseInt('<%=GridView1.PageIndex +1 %>');

// Get total number of pages for grid view
var maxPages = parseInt('<%= GridView1.PageCount %>');


// Calling jQuery Slider method to create slider control on the page
$('#slider').slider({
range: "min",
min: 1,
max: maxPages,
value: currentPageNumber,
slide: function (event, ui) {
// Calling asp.net's __doPostBack javascript function to cause postback using javascript
__doPostBack('<%= GridView1.UniqueID %>', 'Page$' + (ui.value));
$('#sliderValue').text("Current Page is: "+ui.value);
}
});

});
</script>

When we view our page in browser, this is what it's going to look like:

Thursday, 16 May 2013

What are the different types of sessions in ASP.NET

This tutorial was brought to you by NetroStar, a Miami-based global web design company.
In ASP.NET there are few options to store data from your application such as for example: View State, Cookies, Control State, Application State or Session State. In this tutorial in the beginning I will describe how to use Session State and later what are different types of sessions.

Session State

Session state is simply a dictionary with key-value pairs and you can read or write it whenever you need during duration of a session. Session is a time when one concrete user interacts with your web application. Session state unlike application state is separate for each user. Using session state is very easy, you can for example save data from a user control to it:
  1. Session["name"] = TextBox1.Text;  
Then you can use this data in any other part of your application simply by referring to it like in the following example:
  1. string welcomeString = "Hello " + Session["name"];  
One of the biggest advantages of session state in ASP.NET is that they are process independent, that means that session state can be saved in separate process so other processes can't affect it. Another advantage is that it also can work without cookies enabled in client's browser.

Types of session state modes in ASP.NET

In this section I'll describe different types of session that you can use in ASP.NET. For each of these types you define settings in web.config file. The two main modes are in-process mode and out-of-process mode. The latter can be divided into two more categories: SQL server mode and cookieless.

In-process Mode

In this mode session staView blogte is stored in a current process and when this process terminates then also the data saved in session state will be lost. This mode is set by default in ASP.NET, underneath you can see example of configuring such a state in web.config file:
  1. <configuration> <sessionstate mode="inproc" cookieless="false" timeout="30" sqlconnectionstring="data source=127.0.0.1;user id=user;password=pass" server="127.0.0.1" port="42424" />  
  2. </configuration>  
The most important parameters of this session state are the following:
  • mode - there can be three values of this parameters - inproc, sqlserver, stateserver. Value inproc in our example indicates that session state is in in-process mode
  • cookieless - boolean value of this parameters indicates if cookies are needed for session state to work
  • timeout - indicates a time for how long a session is valid. Each time when user interacts with your application the timeout is set to current time plus value of the timeout
The biggest advantage of this mode is performance. There are no transfers of data between processes so it's significantly faster.

Out-of-process Mode

In this mode session is stored in separate process so other processes can be terminated and session state will be still maintained. This is a sample configuration of session state in web.config for out-of-process mode:
  1. <configuration> <sessionstate mode="stateserver" cookieless="false" timeout="30" sqlconnectionstring="data source=127.0.0.1;user id=user;password=pass" server="127.0.0.1" port="42424" />  
  2. </configuration>  
Underneath you can see parameters for session state in out-of-process mode:
  • mode value set for stateserver indicates that it works in out-of-process mode
  • service - indicates a server where state service is, in this example it's a localhost
  • port - indicates a port of state service
As I mentioned before the advantage of this mode is that you don't loose session state with a process but it has a worse performance then in-process mode.

SQL Server Mode

In SQL server mode session state is stored in SQL server. To configure it you have to put the following code in web.config file:
  1. <configuration> <sessionstate mode="sqlserver" cookieless="false" timeout="30" sqlconnectionstring="data source=server_name;user id=user;password=pass" server="127.0.0.1" port="42424" />  
  2. </configuration>  
A parameters that are most important in this mode are:
  • mode set to sqlserver value indicates that session state should work in SQL server mode
  • sqlconnectionstring - it contains a string with name of the server, user name and password for SQL server
In this mode the biggest advantage is reliability that you won't loose session state, however the disadvantage is that it's slower than previous modes.

Cookieless

In this mode cookies in client's browser are not required to be enabled. This mode works by modifying URL address with id that identifies the session. The configuration is the following:
  1. <configuration> <sessionstate mode="stateserver" cookieless="true" timeout="30" sqlconnectionstring="data source=127.0.0.1;user id=user;password=pass" server="127.0.0.1" port="42424" />  
  2. </configuration>  
Parameter that is vital for this mode is "cookieless" - set in our example to true, which means that cookies are not needed to maintain the state. You already know what is the advantage of this solution - it doesn't require cookies.

Closing remarks

In this tutorial you learned how to use session state to store data and than to retrieve it. You also learned about different modes of session state, how to configure them and what are advantages and disadvantages of each one of them. As you can see session state is an easy mechanism to pass data within a user's session.

Thursday, 2 May 2013

SQL Server Database BackUp using C#

There are various ways to take the SQL Server database backup. You can take the database backup using SQL Server backup wizard or using SQL Server BackUp Database statement. Here I am going to describe how to take the SQL Server database backup programatically using C# and SQL Server Management Objects (SMO).

In my previous posts, I explained Partial Methods,Contextual Keyword, C# Static Methods and some other articles related to C#, ASP.Net and SQL Server .

SQL Server Management Objects (SMO) is a collection of objects that are designed for programming all aspects of managing Microsoft SQL Server.


For taking the database backup using  C#, you have to add the following references in your application-

Microsoft.SqlServer.ConnectionInfo
Microsoft.SqlServer.Management.Sdk.Sfc
Microsoft.SqlServer.Smo
Microsoft.SqlServer.SmoExtended
Microsoft.SqlServer.SqlEnum

In your .CS file you will have to use the following namespaces-

using Microsoft.SqlServer.Management.Smo;
using Microsoft.SqlServer.Management.Common;

After using above namespaces, write the following code to take the database backup-

public void BackupDatabase(string databaseName, string userName, string password, string serverName, string destinationPath)
        {
            //Define a Backup object variable.
            Backup sqlBackup = new Backup();

            //Specify the type of backup, the description, the name, and the database to be backed up.
            sqlBackup.Action = BackupActionType.Database;
            sqlBackup.BackupSetDescription = "BackUp of:" + databaseName + "on" + DateTime.Now.ToShortDateString();
            sqlBackup.BackupSetName = "FullBackUp";
            sqlBackup.Database = databaseName;

            //Declare a BackupDeviceItem
            BackupDeviceItem deviceItem = new BackupDeviceItem(destinationPath + "FullBackUp.bak", DeviceType.File);
            //Define Server connection
            ServerConnection connection = new ServerConnection(serverName, userName, password);
            //To Avoid TimeOut Exception
            Server sqlServer = new Server(connection);
            sqlServer.ConnectionContext.StatementTimeout = 60 * 60;
            Database db = sqlServer.Databases[databaseName];

            sqlBackup.Initialize = true;
            sqlBackup.Checksum = true;
            sqlBackup.ContinueAfterError = true;

            //Add the device to the Backup object.
            sqlBackup.Devices.Add(deviceItem);
            //Set the Incremental property to False to specify that this is a full database backup.
            sqlBackup.Incremental = false;

            sqlBackup.ExpirationDate = DateTime.Now.AddDays(3);
            //Specify that the log must be truncated after the backup is complete.
            sqlBackup.LogTruncation = BackupTruncateLogType.Truncate;

            sqlBackup.FormatMedia = false;
            //Run SqlBackup to perform the full database backup on the instance of SQL Server.
            sqlBackup.SqlBackup(sqlServer);
            //Remove the backup device from the Backup object.
            sqlBackup.Devices.Remove(deviceItem);

Thursday, 28 February 2013

Calling an ASP.NET C# Method (Web Method) Using JavaScript


Another title of this article would be "Say bye-bye to Postbacks". Sometimes we need to stop annoying post-backs on ASP.NET Web Pages. For example, when one click the ASP.NET button on webpage, by default page gets post-back. So, how we stop this by keeping proper code-behind method calls. Let's look at one case.
I will create a simple form having two asp.Net textboxes and a button, we will enter our name and address in the textboxes and by clicking button will call the code-behind methods. For this we need to take the advantage of PageMethod and to setup PageMethod we need instance of ScriptManager on web page.
This is what we are going to create:
img1.gif
PageMethod is an easier and faster approach for ASP.NET AJAX. We can easily improve the user experience and the performance of web applications by unleashing the power of AJAX. One of the best things I like in AJAX is the PageMethod.
PageMethod is a way through which we can expose the server side page's methods in JavaScript. This brings so many opportunities; we can perform many operations without using slow and annoying post backs.
Let's create our HTML Page:
    <div>        <p>Say bye-bey to Postbacks.</p>
        <asp:ScriptManager ID="ScriptManager1" runat="server" EnablePageMethods="true"></asp:ScriptManager>
        <asp:TextBox ID="txtname" runat="server"></asp:TextBox>        <br />        <asp:TextBox ID="txtaddress" runat="server"></asp:TextBox>        <br />        <asp:Button ID="btnCreateAccount" runat="server" Text="Signup" OnClientClick="HandleIT(); return false;" />    </div>
Now, in the above code you can see one instance of the ScriptManager and two textboxes and a button at the end. In the button control you will see an attribute 'OnClientClick' to fire the JavaScript Method named "HandleIT()" and this JavaScript Method will call the code-behind C# page method.
Note: Remember to add a new attribute EnablePageMethods and set it to true in the ScriptManager.
Now, look at the JavaScript Code:
<head runat="server">    <title></title>    <script type="text/javascript">        function HandleIT() {
           
var name = document.getElementById('<%=txtname.ClientID %>').value;
           
var address = document.getElementById('<%=txtaddress.ClientID %>').value;
            PageMethods.ProcessIT(name, address, onSucess, onError);
           
function onSucess(result) {
                alert(result);
            }
            function onError(result) {
                alert(
'Something wrong.');
            }
        }
   
</script></head>
In the above code, there is a "HandleIT()" JavaScript Method having two the variables, name and address. These variables will carry the values of the textboxes. Next, a PageMethod named "ProcessIT" is being called that passes the two parameters name and address and the other two parameters will contain the success result and error result. Next, the definition of these success results.
Now look at the code-behind of the C# (PageMethod):
    [WebMethod]
   
public static string ProcessIT(string name, string address)
    {
       
string result = "Welcome Mr. " + name + ". Your address is '" + address + "'.";
       
return result;    }
In the above code, to tell the script manager that this method is accessible through JavaScript we need to ensure two things. First this method should be "public static". Second there should be a [WebMethod] tag in the above method as written in the above code.
Remember to use the namespace "System.Web.Services" for WebMethods.
So, now we are all set to test it.
img1.gif

Tuesday, 19 February 2013

JavaScript calculation in asp.net grid

function CalculateTotalPrice(Price, Quantity, GrossTotal) {

    var LblPrice = document.getElementById(Price);
    var TxtQuantity = document.getElementById(Quantity);
    var TxtGrossTotal = document.getElementById(GrossTotal);

    if ((TxtQuantity.value == '') || (TxtQuantity.value == '0')) {
        var Quantity_ = 0;
    }
    else {
        var Quantity_ = TxtQuantity.value;
    }

    TxtGrossTotal.value = (parseFloat(LblPrice.innerHTML) * parseInt(Quantity_)).toFixed(2);
}